Friday, October 12, 2012

Forrest Gump Jenny Costume

UPDATE:1/1/2014 so its been a really long while since I've worked on my blog so I think I will start by updating this one...to make a long story short Forrest shocked the heck out of Jenny and proposed at the party, down on one knee with his two sweet children and asked me to marry him!  364 days later we were married!  So here
are photos from the actual proposal which happened to be the only pictures I got of the costume.  There is a video floating around somewhere I will try to post also if I can find it!


Oct 2012: So for a 1960's Halloween party we were invited to, Steven and I decided it would be fun to be Jenny and Forrest from Forrest Gump.  I had to get creative, but overall I am very thrilled with the results!


 Thumbnail
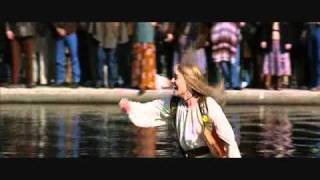
The look I was going for...

First I started on the fur coat.  Unfortunately the fabric store I went to had limited resources so I had to get crafty.  They didn't have enough of the brown color, and the pink had more fabric but not enough to do sleeves like in the picture.  However, as was common to the 1960's time,they did wear vests (which she also has on in the mall water scene) so I sewed this:

My amazing boyfriend went home to visit his parents and came back with an actual brown vest from the 1960's that his stepmom wore!  What an awesome surprise!  Now my outfit is perfect.

Next I worked on the dress.  I was going to sew one but without a pattern I quickly realized that wasn't going to work.  I gave up on the Jenny idea and decided to go to Good Will to find a 60's dress of some sort when I found the absolute perfect dress!  It was the right style and shape and even had pretty embroidary.  The only obvious problem was the dress was a dark forest green and I needed it to be white.  I bought it anyway figuring I could try to bleach it.  (This picture below was the only picture I took and this was about halfway through the process, it was actually several shades darker).


Bleaching wasn't so easy.  I googled instructions for the washer, put a cup of bleach in the washer with water on the soak cycle, 2 rounds of 20 minutes each did absolutely nothing.  I took it out and put it in a bucket and poured 3-4 cups of bleach which barely dropped it a shade in an hour.  Finally I got frustrated and dumped the entire gallon into the water which in the next hour dropped it slightly lighter and made it streaky.  At this point I gave up and just left it in the bucket overnight fully expecting it to be in shreds in the morning, but I didn't care, I didn't want to deal with it anymore.  Thought I wasn't going to have a costume...and then I woke up the next morning and it had worked!  I couldn't believe it, it was white!  And even more miraculously, the embroidered design down the sleeves didn't bleach so it left this beautiful stitching.  My biggest regret was not taking a before photo to compare.  Basically the color you see in the background tile was the color before, and here you can see it clearly worked!  I am so excited, I get to be Jenny after all!


Sunday, October 7, 2012

1960's Disco Kid Costume (Simplicity 3680A)

This is what it is supposed to look like.
Each year my family has a themed Halloween party that we call the Octoberfest, or O-fest for short.  This year's theme was the 1960s.  I thought it would be fun and easy to make the girls costumes.  I went to Hobby Lobby and waited in line for a long time and ended up getting some awesome advice from the older women standing in line who were in highschool during the 1960's.  I felt great walking away from there, they assured me that I picked an easy pattern.

This is what I have so far :(


Well aside from starting out sewing the sleeves completely backwards (they are counter intuitive) and having to take them completely apart and re-doing them, the instructions leave out the part about how to connect the bodice to the skirt...well at least they do not show pictures of it.  I also think the measurements for the skirt portion are too small, it does not look like there is any possible way my child is going to fit through that tiny skirt hole, none the less once it has elastic in it.  I think am going to have to cut it quite a bit shorter in order to make the waist fit.  I think I am going to have to wing the directions...as I have no clue where to go from here, and I have a whole other one to make today!

To be continued...

Ok so here we are about a week later and I've got them finished.  I decided to just wing it and start sewing together.  I sort of pleated things. The girls and I really like how it all turned out...


Wednesday, June 27, 2012

Bleached Recycled T-Shirt Covered Recipe Book


Ugly old Photo Binder
 

Pretty New Binder


I have this really ugly photo book that I got for free that I have been using as a recipe book.  I write my recipes on index cards and put them in the sleeves.  I have been thinking about recovering it with fabric but don't have any scraps at the moment.  I do however have this old t-shirt that I accidently ruined with superglue that would look awesome with a bleach treatment.  I have never done the bleach treatments before so here is the tutorial.  Did a few things right and a few wrong.  Only way to learn!
 Supplies:
-Cheap paintbrushes (you don't mind if they get ruined)
-book
-old t-shirt
-bleach (I had general cleaner with bleach in it and it worked just as well as plain bleach.  I figured this out by accident, ruined a favorite skirt while cleaning)
-Glue (I used spray glue, modge podge works just as well)
-exacto knives ( used multiple tips that allowed me to get the curves better)
-contact paper
-pattern (optional, printed from online)
-Piece of scrap cardboard


I printed a clipart from online and put it on the clipboard with a piece of contact paper over top.  I used the exacto knives to cut out the clipart from the contact paper. 


Recipes on index cards in the recipe book.  The open book fits on the tee shirt.  I put a piece of cardboard between the layers of the t-shirt so it didn't leak through and make a mess.
To see exactly where to put the images on the t-shirt, I cut pieces of paper the same size as the front cover, binding and back cover.


And laid them out on the t-shirt

I then stuck the contact paper to the t-shirt where the pages were, leaving the binding paper in place as a reference.
 
Here is where things stopped working as I expected.  I used paintbrushes to brush on the bleach...and it bled quite a bit under the contact paper (as you can see from the design on the left).  To compensate, for the design on the right, I used a brush that was much smaller than the cut out area to allow for some bleeding.  I then peeled off the contact paper and hand painted a few flowers in the gaps.  It took about 5-10 minutes for the bleach to fully change the color.  I intended to leave it on for 20 minutes to be sure it set and then this happened....


Before.
After.  The bleach ate the brushes.  It was only a matter of time before it ate into the t-shirt too.


I Washed and dried the tshirt by itself.  I opened the book and laid it across the images.  Traced with a marker, leaving one inch extra on each side and cut it out.

I Rolled the image and press flat with my hands, making sure to get out all of the wrinkles.  Sprayed the front of the book with the spray glue.  Placed the roll on the book making sure to leave an inch around all edges.  Unrolled a little at a time making sure to pull taught to keep any wrinkles from forming.  It takes a little bit for the glue to set so if there is a wrinkle, you should be able to pull the fabric back up and press out the wrinkle with your hands.  Do this for the binding and the back of the book, being careful when spraying not to get glue inside the book. 

When I was done covering the outside of the book, I left an inch of fabric around each edge.  I Used modge podge and a brush, put glue on the book around the edges and press the fabric down flat.  I was not too concerned with flat edges so I didnt cut the fabric very straight (I don't have that kind of patience).  I left it open for the glue to dry. 

Front
Back
 

Tuesday, June 26, 2012

Icing Trials

I made 3 different batches of icing today and have been trying to teach myself to decorate cakes.  It is so much harder than it looks in all the tutorials and youtube videos!  Here are all of my failed attempts from today.  I guess on this project, practice is going to have to make perfect cause I'm not getting it the first several batches that I've tried.
Buttercream icing roses turned out more like cabbages hah!  They were so flat, I don't know yet what I did wrong here.

these are supposed to be apple blossoms and it is just a table of complete mess.

These were supposed to be swirl drop flowers out of buttercream but no matter how many I made, I couldn't get it to work.  These things still look cool though, whatever they are.

These are made out of royal icing and although they are cool looking, they were completely 2 dimensional, I was trying to make regular roses.  the smaller "flowers" if you can call them that were supposed to be apple blossoms but I couldn't figure out that technique either.  They do look quite a bit better after drying.  When they were wet, they just looked like messy blobs.

This was after I gave up on flowers altogether and tried to use up the rest of the royal icing with the only technique I've mastered...the swirl.  Still haven't figured out how to make the leaves have just one point.  When I pull away, they always have 2.  I've kind of figured out if I pull up sometimes they have one point like normal.  I think with more practice I'll get the leaf figured out.

Covering oreos with marshmallow fondant.  That was so hard!  It wanted to wrinkle at the bottom even if I cut it to size.  Trimming the extra off was difficult too.

Oh what a mess.  If the boyfriend came home 10 minutes sooner to this mess, he would have had a cow!

Added embellishments from a previous decorations practice, those were royal icing I think.

These stacked oreos look like baby cakes,  the photos make it look better than it looks in real life.  Its very sloppy.

I got the cookie crumbs and icing all over the white fondant

My poor attempt at piping, broke when I put it on top.  I also cut the fondant too small and it didn't wrap around the cookie.  Fail.

More cabbages.
More practices to come and hopefully some successes to report!

Monday, June 25, 2012

New Jewelry

Made some new pieces of jewelry today!  I can't remember the last time I made something for myself and with the possibility of a new job coming up, I need some new pieces to jazz up my outfits.  These were some very easy pieces to throw together (actually did them all while watching a movie) and will go great with the perfect outfit.

This is actually a very long necklace that I looped so I could take a pic.  It is only one layer.


This is actually only one long layer also.

 
Bracelet
Back of bracelet (terrible photo)

Friday, June 22, 2012

Marshmallow Fondant Trials

Recently I have been teaching myself how to decorate cakes.  I decided to try fondant, but I know nothing about it.  I have never even tasted fondant but it always looks so pretty so I thought I'd try it.  I found several recipes for Marshmallow fondant here , here and here although all the recipes seem relatively the same, the comments where helpful and all of the reviews said it was easy and tasted great, so I was sold!

So far it was a very easy project.  The biggest lesson I learned the hard way was to not use Crisco when I dug my hands into the dough.  It was quite comical trying to get it back off my hands again.  Definitely use Crisco on your hands when mixing.  The other big difference was that most people used a kitchen aid mixer with the dough mixer/hook and I don't have a Kitchen Aid but that was no problem, just helped build a little muscle!
Supplies...and big mess.

Put some Crisco in a bowl on the side so you can dip your fingers in as needed

Sticky sticky sticky mess.  Mix most of the sugar into the bowl, makes less mess later

Finally done and I impatiently had to wait overnight to play with it

Very 1st attempts at roses.  I had to hang it upside down to keep the petals from falling too much.  Using the right amount of water to get them to stick was key.

Started small by attempting to cover an oreo.  Was not easy. 


This is where I stopped for now.  I am sure there will be more to come!